
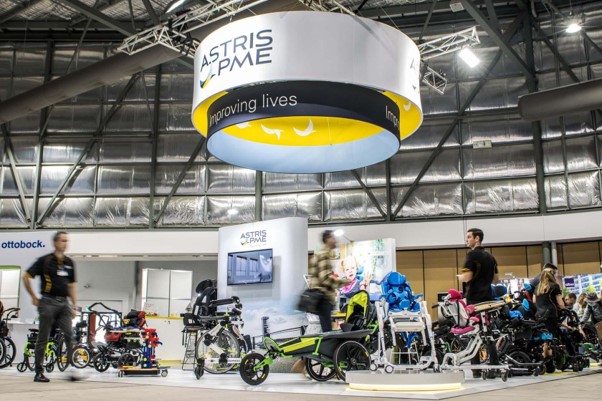
Commissioning a custom exhibition stand comes down to five clear steps: from defining your brief all the way through to planning what happens after the show. Get each one right, and you end up with a stand designed to reflect your brand and perform at every event, not a generic booth that blends into the aisle.
At ProEx Displays, we’ve built custom exhibition stands for over 300 projects across Sydney, Melbourne, Brisbane, Adelaide and the Gold Coast, managing every stage in-house from concept to installation. This guide walks through exactly what to specify, what to ask your builder, and how to plan the process so nothing is left to chance.
Why Go Custom Instead of Off-the-Shelf?
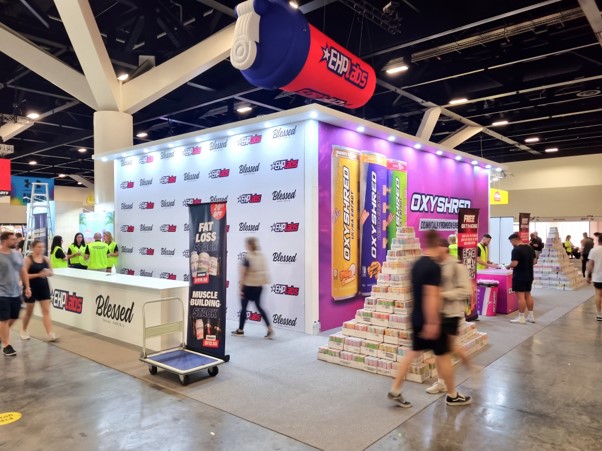
A custom exhibition stand allows you to show off your brand to the best of its potential. This is because you have complete creative freedom to stand out amongst your competitors on an often crowded exhibition floor.
There are four big reasons to choose a custom stand over one that comes off the shelf:
- Design Freedom. You can have any shape, any size, multi-level, you name it. Our team can build it to fit your creative and branding mission.
- Big Brand Impact. You stand out from your neighbouring stands at a trade show and attract more potential clients. You can install bespoke materials, creative lighting, interactive displays and more.
- Tailored Functionality. You can have private spaces for client meetings; secure storage to hold valuables; interactive tech hubs to really grab the attention of people passing by.
- Maximised Product Focus. You choose what will be the hero of your exhibition stand. Will it be your product? How about a big screen with an exciting presentation? You get to choose, rather than trying to fit your idea into a rigid frame.
Step 1: Define Your Brief and Objectives
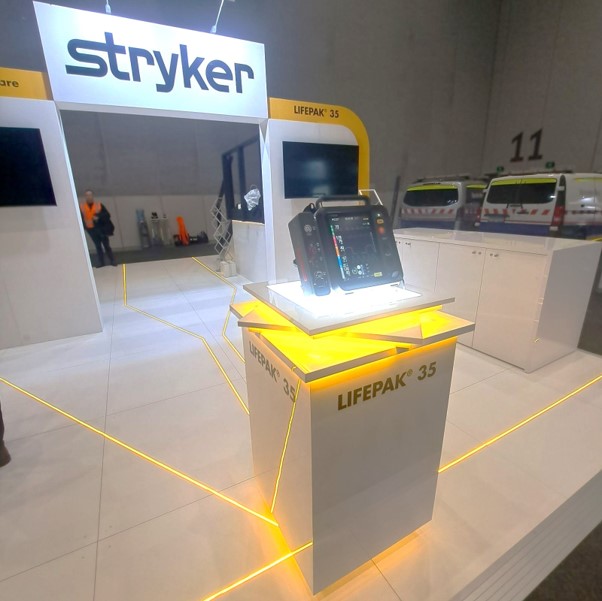
Your brief starts with your brand’s objectives at the booth and your goals for the event overall, alongside a realistic budget. These decisions shape your design brief, and your design brief shapes everything the stand needs to achieve.
Get clear on your strategic objectives before design work begins. If lead generation is the goal, set a specific target and define what “qualified” means for your business, whether that’s capturing contact details or booking a follow-up meeting.
If you’re launching a product, decide whether the stand needs to physically showcase it or run a live demonstration. If brand awareness or market authority is the priority, build the stand around that instead.
From there, map out the visitor journey to your stand:
- Aisle Attraction. This is where you attract the attention of people walking past. Digital screens and sound, bright lights and colours, draw them in and keep them engaged.
- Engagement Zone. Your stand is an interactive environment where people can speak to someone, make quick enquiries, or sit down for a longer conversation and sales talk.
- Call to Action. Make the core offering of your business, and your stand, immediately identifiable. When someone arrives, they know within seconds what’s going on and what they’re going to do.
From here, you work with the space you’re given. What spatial constraints do you have to work with? Get these exact details from the event hosts.
Stand Sizes
- 3x3m (9 sqm): Standard starting point for a backwall, a counter, and 1–2 staff.
- 3x6m (18 sqm): Fits product displays, a reception desk, and a consultation area.
- 6x6m (36 sqm): Island or peninsula setup with dedicated zones for live demos.
- 9x6m (54 sqm)+: Large footprint featuring private meeting rooms and high hospitality capacity.
Layout Configurations
- Inline / Row: Open on one front side; budget-friendly with a strong backwall.
- Corner: Open on two sides for higher foot traffic and visibility.
- Peninsula: Open on three sides; excellent aisle access but requires built-in storage.
- Island: Open on all four sides for 360-degree engagement and maximum brand presence.
- Venue Rules. What you can and cannot do with your exhibition space. Can you rig things from the ceiling? Are there strict bump-in and bump-out timelines?
- Budget Restraints. Give us an honest budget. This helps us decide on the materials we’ll use and the time we can invest in your project. Redesigns and refits can be costly to you.
And finally, align your stand with your brand guidelines. You want to be remembered well after leaving. Some soft drink brands and car brands can be identified purely by colour.
- Visual Identity. Share your colour codes, your typography and logo rules with us. The more we have, the better we can work it into the design.
- Material Selection. What your stand is built from can say a lot about your brand. Homely brands might want more natural materials to reflect nature; slick, tech companies might want shiny silver for that modern look.
- When we’re creating your custom stand, let us know if you intend to reuse it at multiple events.
Step 2: Choose the Right Exhibition Stand Builder
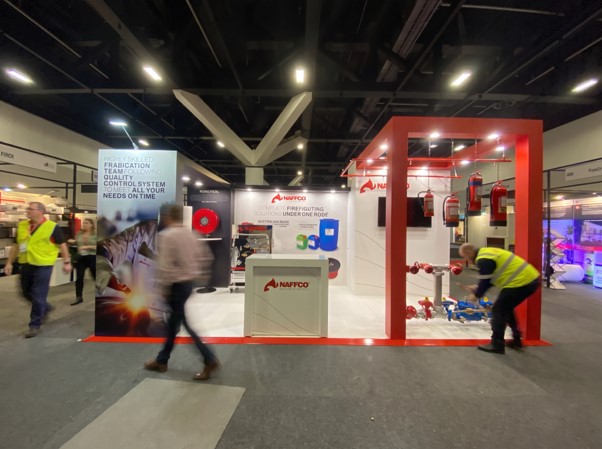
Choosing the right builder ensures your custom exhibition stand is functional, visually striking, and built to engage audiences. If you’re after exhibition stand builders Gold Coast or Sydney based, here’s what sets us apart:
- In-House Production. We handle fabrication ourselves with our own qualified joiners, which means better quality control from start to finish.
- End-to-End Service. We manage everything from 3D design and fabrication to logistics, installation, and post-event storage.
- Australia-Wide Reach. We deliver and set up your booth across major cities including Melbourne, Sydney, and Brisbane.
- Industry Experience. Check our portfolio for past work with reputable brands in your specific sector.
Step 3: Specify Materials
Plan your project with our in-house design team to scope your size, layout, and material needs before a single panel is built.
Material Choices
- Timber & Plywood: Best for sturdy structural frameworks and custom joinery.
- Fabric Tension Panels: Lightweight choice for smooth, large-format graphics.
- Acrylic: Ideal for clear product showcases and protective display cases.
- Powder-Coated Metal: Used for load-bearing pillars and structural support.
Step 4: Incorporate Technology and Interactive Elements
What kind of technology would you like to incorporate with your stand and is it appropriate? You don’t want to over-cater to the technology if you don’t need it. Sometimes speaking to a human is a much more rewarding experience than clicking on a touch screen. It can save you a good amount of money as well.
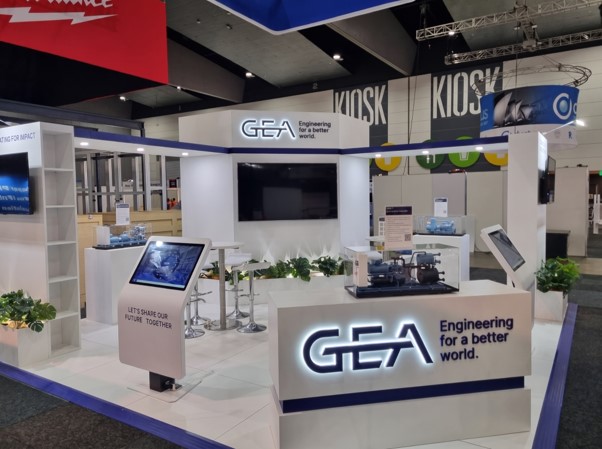
If you’re wanting technology on your stand, here are some ideas:
- Video Walls. LED Displays. Big screens showcasing who you are and what you do. If they’re large and high definition, they can be seen from further away and attract more people.
- Touchscreens. Let people click through and swipe around your products at their own pace. Include an option to order, or to ask for more details, and a way to capture their details as well.
- Gamification. Get people playing games about your products, and enjoying themselves. It can be games on the touchscreen, a quiz where they compete against other people.
Step 5: Plan for Transport, Storage and Reuse
Where is the stand being stored before use? How are you going to get it to the event and set up? Can it be taken down (bumped-out) easily for use at more shows? Is it going back to the same Exhibition or Convention centre?
Your exhibition stand needs to be modular. This makes it so much easier to put together and take down after a long day.
Check the facilities where you store your stand between exhibitions. Is it secure? Is it dry and clean? ProEx offers storage of trade show stands at competitive rates to maintain a one stop shop for your exhibition needs.
Final Thoughts on Commissioning Your Custom Stand
Getting a custom exhibition stand right comes down to preparation. Nail your brief, pick a builder who manages the whole process in-house, and think ahead to transport and reuse, and you end up with a stand that keeps earning its cost across every show it attends rather than one you’re patching up or replacing after a single outing.
At ProEx Displays, we design, build and install custom exhibition stands for businesses across Brisbane, Melbourne, Perth, Sydney, Gold Coast and Adelaide, managing every stage from concept through to installation and storage.
If you’re ready to start specifying your next stand, get in touch with our team to talk through your brief and explore the possibilities!